How to Make a Video with Pictures in 2025

Creating videos with pictures and music has never been more exciting. In 2025, tools like Boolvideo make it simple for anyone to craft stunning videos. Whether you’re celebrating a milestone or showcasing your creativity, you can now easily add photos and music to tell your story. Did you know 72% of people prefer videos over text when learning about products? With such trends, knowing how to make a video with pictures is a skill worth mastering. Ready to create something unforgettable? Let’s get started!
Key Takeaways
Pick a simple video tool to make things easier. Boolvideo is easy to use and great for all skill levels.
Sort your pictures before starting your video project. Keeping them in clear folders saves time and helps with uploads.
Choose free music that fits your video's feeling. Match the music to your pictures for a polished result.
Add transitions and effects carefully to improve your video. Use a few styles to keep it looking neat and smooth.
Save your video in the best format and quality. Check it on different devices to make sure it looks good everywhere.
Choosing the Right Tool for Video Creation
Why the Right Software Matters
Picking the right video creation tool can make or break your project. The right software saves you time, simplifies the process, and ensures your video looks professional. Imagine struggling with clunky interfaces or limited features—it’s frustrating, right? That’s why you need a tool that’s intuitive and packed with options. Whether you’re a beginner or a pro, the right software helps you focus on creativity instead of technical headaches.
Overview of Popular Tools in 2025
Boolvideo: The Best Tool for Beginners and Pros
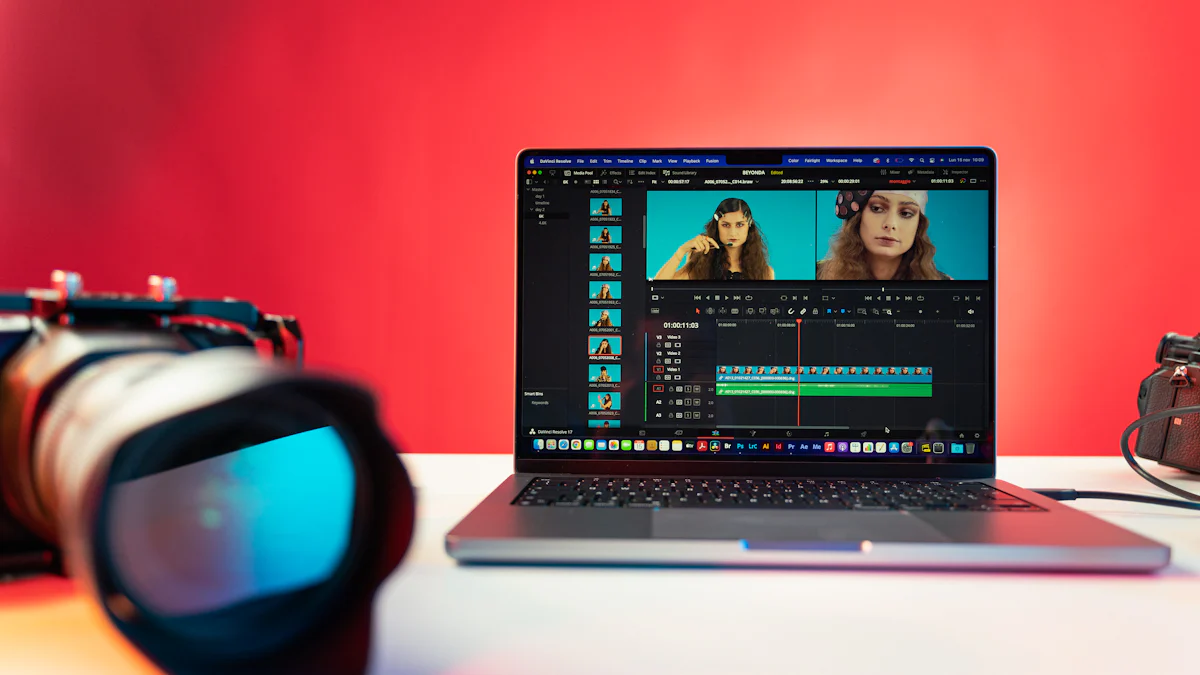
Boolvideo is the top choice for producing marketing videos by 2025. It is very suitable for beginners because it has user-friendly editing functions. Professionals love its advanced tools, such as AI driven background removal and image enhancement. Especially if you want to generate a dynamic video from an image, it is undoubtedly a great choice. Recently, Boolvideo's functionality has been further upgraded, making it easy to turn images into videos. Images are static, and when users see your product content, they will definitely want to see more dynamic content. They can intuitively see the appearance of the product on their body, helping them make clearer judgments. So you must not miss it!
Do you want to know how this feature is implemented? Follow the video to experience it~
Create Videos Now
Don't you want to get a high-quality dynamic video?
Firstly, you need to open Boolvideo and click on its new feature. There are two options: one is to generate dynamic videos from images, and the other is to generate dynamic videos from product URLs~
Then, let's demonstrate with pictures. Select a picture of your product, input it, click "Generate", and wait for 3-5 minutes to get a video.
Let's take a look at the generated video effect, isn't it very vivid? If you think it's not bad, try it out quickly!

Feature | Description |
|---|---|
User-Friendly Editing | Lightweight editor for quick adjustments and a robust timeline editor for advanced editing. |
Brand Kit Integration | Integrates logos, fonts, and color schemes for consistent branding across videos. |
Advanced AI Tools | Includes features like Background Remover and Image Enhancer for professional video quality. |
Scalability for Growth | Supports bulk video production for easy scaling of marketing efforts. |
Other Alternatives: CapCut, Adobe Express, VEED
If Boolvideo isn’t your style, there are other great options. CapCut offers simple editing tools and is popular for social media content. Adobe Express is perfect for quick, polished videos with templates. VEED provides a balance of ease and advanced features, making it a solid choice for creators of all levels.
Key Features to Look for in a Video Creation Tool
When choosing a tool, focus on features that make your life easier and your videos better. Here’s what to look for:
Ease of Use: Intuitive interfaces and automation features save time and energy.
Customization: Flexible templates and personalization options help align with your vision.
AI-Powered Tools: Automate tasks like transitions and syncing text with voiceovers.
Media Library: Stock footage, music, and animations enhance your video quality.
Scalability: Whether it’s one video or a hundred, the tool should grow with your needs.
With the right tool, creating a video becomes less of a chore and more of a fun, creative process. Ready to dive into your next tutorial? Start exploring these tools today!
Step-by-Step Guide to Make a Video with Pictures and Music
Importing Your Pictures
Organizing Your Photos for a Smooth Workflow
Before you dive into creating your video, take a moment to organize your photos. A little prep work can save you a lot of time later. Start by setting up a clear folder structure on your computer. For example, you could create a "Video Project" folder with subfolders like "Raw Photos" and "Edited Photos." If you’re working with a lot of images, tools like Adobe Lightroom can help you filter and group them efficiently. You might also want to separate personal and business projects into different folders to keep things tidy. This way, when it’s time to upload, everything is exactly where you need it.
Uploading Pictures to Boolvideo or Other Tools
Once your photos are organized, it’s time to upload them. Open your chosen video creation tool, like Boolvideo, and look for the "Import" or "Upload" option. Select all the photos you want to include in your video. Most tools let you drag and drop files directly into the timeline, making it super easy to add pictures and music into the timeline. Arrange your photos in the order you want them to appear. If you’re using Boolvideo, you’ll love how smooth and intuitive this process feels.
Adding Music to Your Video
Choosing the Right Song for Your Video
Music sets the tone for your video, so choose wisely. Here’s a quick checklist to help:
Opt for royalty-free music to avoid copyright issues.
Explore staff picks or curated playlists for inspiration.
Match the mood of the song to your video’s theme.
Test a few tracks to see which one fits best.
Proof the final cut to ensure the music complements the visuals.
Whether you’re creating a heartfelt slideshow or a fun birthday montage, the right song can make all the difference.
Uploading and Syncing Music with Your Pictures
After picking your song, upload it to your video editor. Most tools, including Boolvideo, allow you to drag the audio file directly into the timeline. Adjust the music’s length to match your video. If needed, trim the song or loop it to fit perfectly. Syncing the music with your pictures is key. Pay attention to the beat and try to align transitions with the rhythm for a professional touch.
Adding Transitions and Effects
How to Use Transitions to Enhance Flow
Transitions help your video flow smoothly from one picture to the next. Simple options like cuts work well for fast-paced videos, while fades are great for emotional moments. Want to add some flair? Try wipes or zooms for a dynamic feel. Just remember, less is more. Stick to a few consistent transitions to keep your video cohesive.
Applying Basic Effects for a Polished Look
Effects can take your video to the next level. Start with basics like brightness and contrast adjustments to make your photos pop. Add subtle filters to create a unified look. If you’re feeling adventurous, explore 3D transitions or animations. But don’t overdo it—your goal is to enhance, not overwhelm. With Boolvideo, applying effects is as easy as clicking a button.
Exporting and Saving Your Video
Choosing the Right Format and Resolution
Exporting your video is the final step, and getting it right ensures your hard work shines. Start by choosing the correct format. MP4 is a safe bet because it’s compatible with almost every device and platform. Next, match the resolution to your source footage and where you plan to display the video. For example, if your video is in 1080p, keep it that way for crisp visuals.
Bitrate also plays a big role in quality. For a 1080p video at 24 fps, aim for a bitrate between 8 and 12 Mbps. If your video has fast-moving scenes, you might need a higher bitrate to avoid blurry or pixelated moments. Most tools, like Boolvideo, let you adjust these settings easily. Don’t forget to optimize encoding for performance and compatibility. Once exported, test your video on different devices to ensure it looks great everywhere.
Pro Tip: If you’re unsure about settings, many tools offer presets like “High Quality” or “Web Optimized.” These can save you time while delivering excellent results.
Saving and Sharing Your Video Online
Now that your video is ready, it’s time to share it with the world! Start by saving it to a secure location, like a cloud storage service or an external drive. This ensures you have a backup in case something goes wrong.
When it comes to sharing, platforms like Decktopus are fantastic for slideshow videos. They combine ease of use with creative options, making your video stand out. Social media platforms like Instagram, TikTok, and YouTube are also great choices. Each platform has its own audience, so pick the one that aligns with your video’s purpose.
Before uploading, double-check the platform’s recommended file size and resolution. This avoids compression issues that could lower your video’s quality. Once uploaded, add a catchy title and description to grab attention. If you’re sharing on social media, hashtags can help your video reach more people.
Quick Tip: Share your video privately with friends or colleagues first. Their feedback can help you make final tweaks before going public.
With these steps, your video is ready to impress!
Advanced Tips to Enhance Your Slideshow Video with Music
Adding Text and Captions
How to Use Text to Tell a Story
Text can transform your slideshow video with music into a compelling narrative. To make your captions engaging, follow these steps:
Use a text style with a background highlight and contrasting colors. This ensures your captions are easy to read. Start with a font size of 32 and adjust as needed.
Place text boxes in non-intrusive areas, like the bottom of the screen or over plain backgrounds. Consistency is key, so layer your text boxes in the same spot throughout the video.
Sync your captions with the audio. Use the timeline feature in your video editor to time each sentence perfectly. This creates a seamless connection between the visuals, text, and music.
Choosing Fonts and Styles That Match Your Theme
Fonts and styles set the mood for your video. For a professional look, stick to clean and modern fonts like Arial or Helvetica. If your video has a playful theme, try decorative fonts like Comic Sans or Lobster. Avoid mixing too many styles. Instead, pick one or two fonts that complement your theme. Pair them with subtle animations to make your captions pop without distracting viewers.
Using Audio Effects for Better Sound Quality
Adjusting Volume and Adding Fade Effects
Audio effects can elevate your video’s sound quality. Start by balancing the volume. Ensure the music doesn’t overpower the visuals or any voiceovers. Add fade-in and fade-out effects to create smooth transitions between audio clips. These small adjustments make your video sound polished and professional.
Removing Background Noise
Background noise can ruin an otherwise great video. Here’s how you can fix it:
Use tools like Riverside to enable noise reduction during recording.
In post-production, apply features like "Magic Audio" to clean up the sound.
For advanced editing, try software like Audacity. Open your audio file, use the Noise Gate tool to remove unwanted sounds, and export the cleaned file.
Feature | Description |
|---|---|
Remove Background Noise | Eliminates unwanted ambient sounds from the audio. |
Improve Speech Clarity | Enhances the intelligibility of spoken words. |
Fix Volume Levels | Adjusts audio levels for a balanced sound experience. |
Exploring 3D Effects and Animations
How to Add 3D Transitions
3D transitions can make your slideshow video with music stand out. Use effects like cube rotations or page flips to add depth between photos. Most tools let you drag and drop these transitions onto your timeline. Experiment with different options, but keep them consistent to avoid overwhelming your audience.
Using Animations to Make Your Video Stand Out
Animations bring your video to life. Add subtle movements to your photos, like zoom-ins or pans, to create a dynamic feel. You can also animate text or icons to emphasize key moments. Tools like Boolvideo make it easy to apply these effects with just a few clicks. Remember, less is more. Use animations sparingly to keep your video elegant and engaging.
Why Boolvideo is the Go-To Tool in 2025
User-Friendly Interface for Beginners
Boolvideo makes video creation simple, even if you’re just starting out. Its interface is designed to guide you every step of the way. You’ll find tools that are easy to use but still powerful enough to create stunning videos.
Here’s what makes Boolvideo beginner-friendly:
Feature | Description |
|---|---|
Lets you make quick tweaks without feeling overwhelmed. | |
Robust timeline editor | Gives you more control when you’re ready to try advanced editing. |
Detailed guides and tutorials | Walks you through the platform so you never feel lost. |
With these features, you can jump in and start creating without a steep learning curve. Boolvideo ensures you spend more time being creative and less time figuring out how things work.
Advanced Features for Professional Creators
If you’re a pro looking for advanced tools, Boolvideo has you covered. It offers features that help you create polished, professional videos effortlessly.
Feature | Description |
|---|---|
Product URL to Video Conversion | Turns product links into engaging videos by pulling images and details automatically. |
Customization Options | Lets you add animations, voiceovers, and branding elements to make your videos unique. |
Advanced AI Tools | Includes tools like background remover and image enhancer for a professional finish. |
Brand Kit Integration | Keeps your videos consistent with your brand’s logos, fonts, and colors. |
These features make Boolvideo a favorite among creators who want to take their videos to the next level. Whether you’re crafting marketing content or personal projects, Boolvideo gives you the tools to shine.
Affordable Pricing and Free Trial Options
Boolvideo doesn’t just deliver on features—it’s also budget-friendly. You can explore its capabilities with a free trial before committing. Once you’re ready, the pricing plans are designed to fit different needs, whether you’re a casual creator or running a business.
This combination of affordability and flexibility makes Boolvideo accessible to everyone. You get premium features without breaking the bank, making it the go-to tool for video creation in 2025.
Seamless Integration with Social Media Platforms
Sharing your video on social media should feel effortless, right? Boolvideo makes it happen. It’s designed to help you create and share videos that look amazing on any platform. Whether you’re posting on Instagram, Facebook, or even an e-commerce site, Boolvideo has you covered.
Boolvideo’s ability to create videos optimized for multiple platforms — such as Facebook, Instagram, and e-commerce sites — makes it an indispensable tool for omnichannel marketing.
Here’s how Boolvideo simplifies the process:
Platform-Specific Templates: You don’t need to worry about resizing or reformatting your video. Boolvideo offers templates tailored for different platforms. For example, you can create vertical videos for Instagram Stories or square ones for Facebook posts.
Direct Sharing Options: Once your video is ready, you can upload it directly to your social media accounts. No need to download and re-upload. This saves time and keeps your workflow smooth.
Customizable Export Settings: Boolvideo lets you adjust settings like resolution and aspect ratio. This ensures your video looks perfect, whether it’s on a mobile feed or a desktop screen.
Pro Tip: Use Boolvideo’s built-in analytics tools to track how your videos perform on social media. This helps you refine your content and reach more viewers.
With Boolvideo, you can focus on creating content that connects with your audience. The seamless integration with social platforms means you’ll spend less time on technical details and more time sharing your story. Ready to make your next post a hit? Start with Boolvideo and see the difference!
Creating a video with pictures and music is a rewarding way to share your story. With tools like Boolvideo, the process becomes simple and enjoyable. You can easily add photos, sync music, and apply effects to craft a professional-looking video. To make your video stand out, focus on building emotion into your story and keeping it relatable. Add a touch of conflict and wrap it up with a satisfying resolution.
Experiment with creative ideas like travel showcases, inspirational quotes, or even DIY tutorials. Use slideshow templates to save time or add humor to keep your audience entertained. Remember, videos offer a personal connection that builds trust and relatability. So, start exploring how to make a video with pictures today and bring your ideas to life!
Tip: Enhance your slideshow video with music by adding captions, animations, or interactive elements. These small touches can make a big difference in viewer engagement.
FAQ
How long does it take to create a video with pictures and music?
The time depends on your project size and tool. For a simple slideshow, you can finish in 30 minutes using Boolvideo. Larger projects with effects and animations might take a few hours.
Can I use copyrighted music in my video?
No, you should avoid copyrighted music unless you have permission. Use royalty-free tracks from platforms like Epidemic Sound or the built-in libraries in tools like Boolvideo.
What’s the best resolution for my video?
For most projects, 1080p (Full HD) works great. It’s clear and compatible with most devices. If you’re creating for social media, check the platform’s recommended resolution.
Do I need professional editing skills to make a good video?
Not at all! Tools like Boolvideo are beginner-friendly. They offer templates, drag-and-drop features, and AI tools to simplify the process. You’ll look like a pro without the steep learning curve.
Can I edit my video after exporting it?
Yes, but it’s easier to edit before exporting. Save your project file in the tool you’re using. This way, you can make changes without starting from scratch.
See Also
Become Proficient in Transforming Ideas into Videos by 2025
Streamline Video Production for Marketers This Year
Tips for Making Impactful TikTok Videos for Products
Accelerate your video production
10X with Boolvideo