How to Animate Still Photos Using AI Tools for a Moving Picture Effect
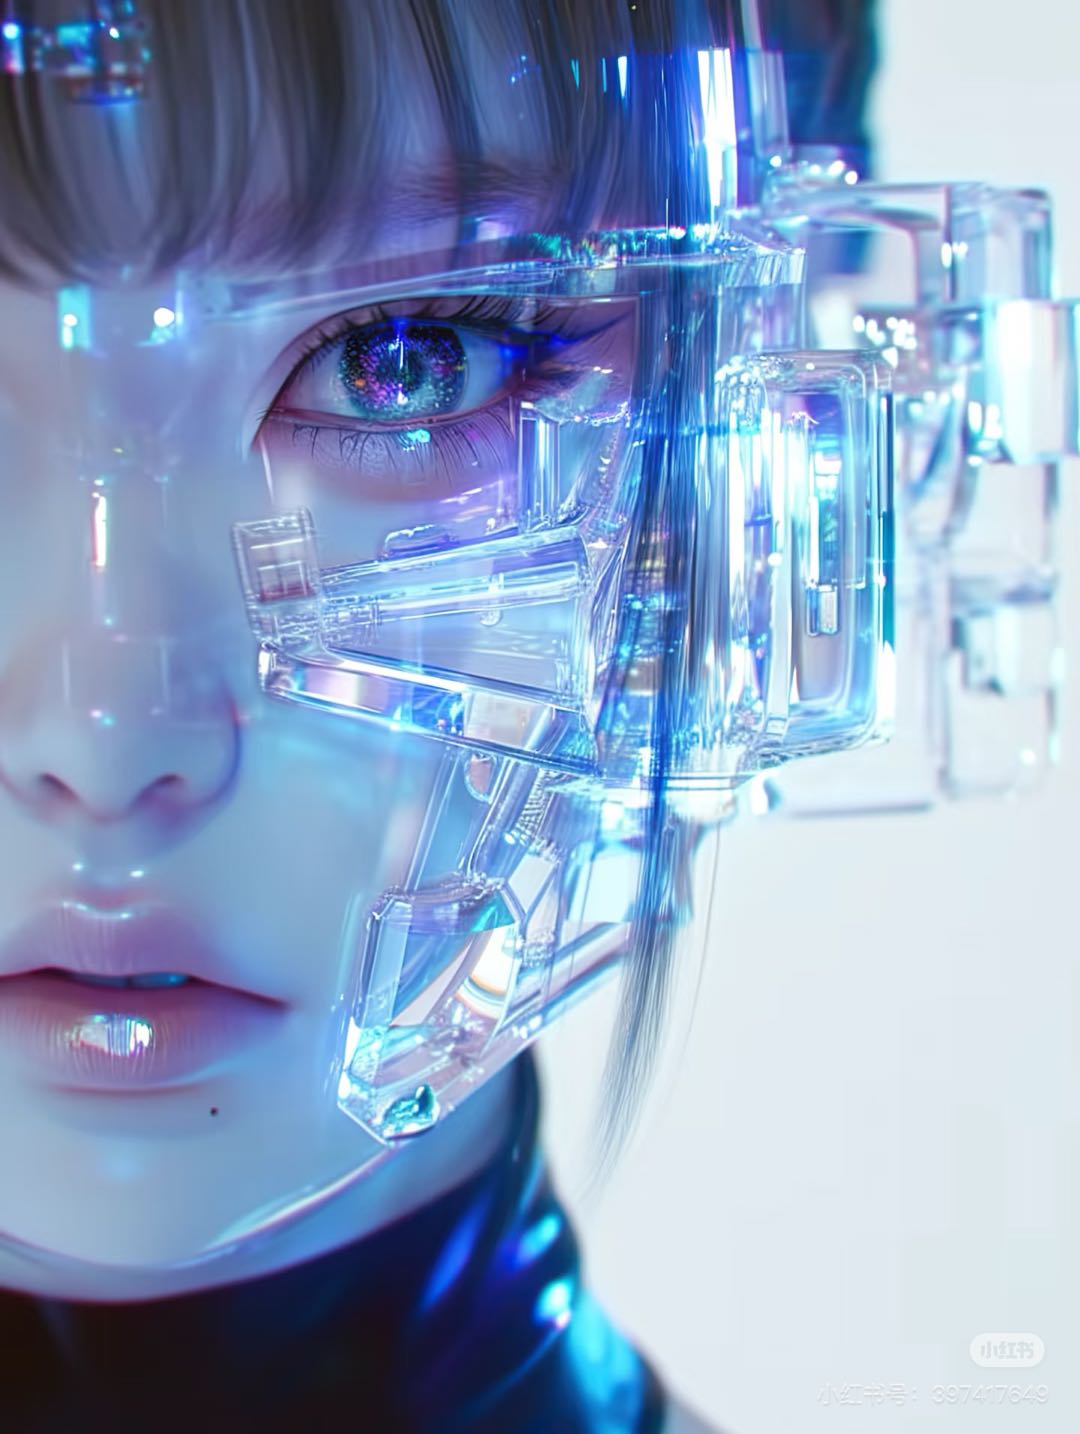
Have you ever wished your still photos could come alive? That’s exactly what the moving picture effect does—it transforms static images into dynamic visuals that feel alive. This effect adds motion to photos, like subtle facial expressions or flowing backgrounds, making them more engaging and captivating.
AI animation tools make this process incredibly simple. They save you time by automating complex tasks and offer creative options that were once impossible without professional skills. Tools like boolv even let you animate photos effortlessly, whether you’re a beginner or an expert. With AI, anyone can create stunning animations in minutes, no matter where they are.
The best part? You don’t need any prior experience. Just upload your photo, apply the effects, and watch it come to life.
Key Takeaways
Pick a simple AI animation tool like boolv to make cool animations easily.
Get your photo ready by improving its quality and fixing brightness for better results.
Use gentle animation effects to keep it looking real; don’t overdo it so it stays interesting.
Adjust animation settings like speed and strength to make it smooth and lifelike.
Save your animated photos as GIF or MP4, and edit them for social media to get more attention.
Step-by-Step Guide to Creating a Moving Picture Effect(eg.boolv)
Choosing the Right AI Animation Tool
Animate Still Photos Now!
Get it in Just One Minute
When picking an AI animation tool, you want something that’s easy to use, packed with features, and fits your budget. A good tool should let you create animations without needing advanced skills. Look for options that support various animation styles, offer customization, and produce high-quality results.
Description | |
|---|---|
Ease of Use | Choose a tool with a simple interface that doesn’t require much training. |
Features and Capabilities | Ensure it supports different animation styles and allows customization. |
Output Quality | High-resolution animations are a must for professional-looking results. |
Cost and Pricing | Find a tool that matches your budget, whether it’s free or subscription-based. |
Customer Support | Reliable support can save you time when troubleshooting. |
User Reviews | Check reviews to see what others think about the tool’s strengths and weaknesses. |
Among the many options, boolv stands out. It’s perfect for both beginners and professionals. With boolv, you can transform static images into dynamic visuals effortlessly. Its AI-powered features, like image dynamization, make it a top choice for creating high-quality animations.
Other popular tools include DeepMotion, which specializes in motion capture, and Synthesia, known for its text-to-animation capabilities. These tools showcase how AI simplifies animation creation.
Preparing Your Photo for Animation
Before you upload your image, make sure it’s ready for animation. High-resolution photos work best because they capture more detail, resulting in smoother effects. Blurry or low-quality images might not give you the results you want.
Here’s how to prepare your photo:
Enhance the resolution: Use tools like Photoshop or free online editors to sharpen your image.
Adjust brightness and contrast: This ensures your photo looks vibrant and clear.
Crop unnecessary parts: Focus on the subject to make the animation more impactful.
Taking these steps ensures your photo is optimized for the desired animation style.
Applying Animation Effects with AI
Once your photo is ready, it’s time to bring it to life. AI animation tools offer a variety of effects to choose from. You can add facial movements, like blinking or smiling, or create background motion, such as flowing water or moving clouds.
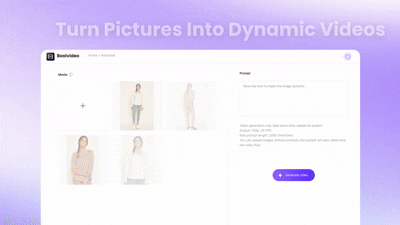
Most tools provide presets that make the process quick and easy. For example, boolv offers customizable options, so you can tweak the effects to match your desired animation style. Want something unique? Experiment with different settings to create a look that stands out.
Tip: Start with subtle effects. Overdoing it can make the animation look unnatural. Preview your work to ensure it feels realistic.
Fine-Tuning and Refining the Animation
Once you've applied the initial effects, it's time to fine-tune your animation for a polished and natural look. Small adjustments can make a big difference in how realistic and engaging your animated photo feels.
Adjusting settings like speed and intensity for a natural effect.
Start by tweaking the speed and intensity of the effects. If the motion feels too fast or exaggerated, slow it down to create a more subtle and lifelike result. For instance, facial movements like blinking or smiling should appear gentle and smooth, not robotic. Adjusting these settings ensures your animation feels authentic.
You can also refine properties like scale and position to enhance the framing. Use keyframes to add dynamic edits, giving you precise control over the animation. For example:
Enable keyframing by selecting the stopwatch icon next to properties like scale or position.
Set multiple keyframes to create transitions, such as zooming in or panning across the image.
Experiment with interpolation methods to control the timing of effects. A "Hold" interpolation creates immediate transitions, while smoother options add gradual changes.
Don't forget to modify opacity settings if needed. This helps balance the foreground and background elements, ensuring the focus stays on your subject.
Previewing and perfecting the animation.
Before finalizing, always preview your animation. This step lets you catch any unnatural movements or inconsistencies. Tools like boolv make it easy to preview your animation in real-time. Watch it closely and ask yourself: Does it look natural? Does the motion enhance the photo without overpowering it?
If something feels off, go back and adjust the settings. Repeat this process until you're satisfied with the result. Remember, the goal is to bring your photo to life while keeping it visually appealing.
Exporting and Sharing Your Animated Photo
After perfecting your animation, it's time to share it with the world. Exporting your animated photo in the right format ensures it looks great wherever you use it.
Export formats (e.g., GIF, MP4) and their uses.
Most AI animation tools, including boolv, let you export your work in various formats. Choose the format based on how you plan to use the animation:
GIF: Ideal for short, looping animations. Perfect for social media posts or embedding in emails.
MP4: Best for high-quality videos. Great for sharing on platforms like Instagram, YouTube, or embedding in presentations.
When exporting, select the highest resolution available to maintain quality. This is especially important if you plan to showcase your animation on larger screens.
Tips for sharing on social media or embedding in projects.
To maximize engagement, tailor your animated photo for the platform you're sharing it on. For social media, consider these tips:
Use hashtags and captions to grab attention.
Optimize the aspect ratio for the platform (e.g., square for Instagram, vertical for TikTok).
Keep the animation short and impactful to hold viewers' attention.
If you're embedding the animation in a project, ensure the file size is manageable to avoid slowing down loading times. Tools like boolv can help optimize your animation for different platforms, making the sharing process seamless.
Tip: Always preview your animation on the platform before publishing. This ensures it displays correctly and maintains its quality.
Best AI Animation Tools to Bring Images to Life
boolv
Features like AI image dynamization and product-to-video transformation.
boolv stands out as one of the best AI animation tools for creating lifelike visuals. Its features make it a go-to choice for both beginners and professionals. Here’s what you can do with boolv:
Animate static images with AI-powered tools to bring images to life.
Convert product URLs into engaging videos optimized for social media.
Upload photos or clips to create shareable videos effortlessly.
Turn creative concepts into stunning animations with advanced AI.
Use pre-designed templates for quick and professional video production.
boolv’s AI image dynamization feature is a game-changer. It transforms still photos into dynamic visuals, perfect for e-commerce sellers looking to captivate their audience. Whether you’re promoting products or crafting advertisements, boolv simplifies the process while delivering high-quality results.
Why boolv is ideal for creating high-quality animations.
boolv is tailored for users who want professional results without the hassle. Its intuitive interface and powerful AI make it easy to create animations that look polished and natural. Plus, it’s designed with e-commerce in mind, helping businesses boost engagement and sales. If you’re looking for a tool that combines creativity with efficiency, boolv is your answer.
Other Popular AI Animation Tools
Overview of tools like Vidnoz, Canva, and Motionleap.
Several other tools also help you create animations with ease. Here’s a quick look:
Vidnoz: Known for its motion capture capabilities, Vidnoz is great for creating realistic animations.
Canva: A versatile design tool that includes animation features, perfect for beginners.
Motionleap: Ideal for adding subtle motion effects to photos, like flowing water or moving clouds.
These tools offer unique features that cater to different needs, from simple animations to advanced 3D animation.
Unique features and pricing of each tool.
Tool | Pricing Structure | Key Features |
|---|---|---|
Appy Pie | Intuitive interface, extensive library | |
Neural Frames | Free plan, $19/month to $99/month | Customizable text prompts, real-time previews |
Live 3D | Free plan, $4.99/month | Tools for VTuber avatars |
Decohere | $9/month to $89/month | Real-time rendering, integration with software |
Krikey | Free plan available | Dynamic 3D character animations |
Blender | Free to use | Extensive suite of modeling and animation tools |
Comparing AI Animation Tools
Side-by-side comparison of boolv and other tools.
boolv excels in areas like ease of use and e-commerce optimization. Here’s how it compares:
Feature | boolv | Canva | Motionleap |
|---|---|---|---|
Ease of Use | Beginner-friendly | Beginner-friendly | Beginner-friendly |
Animation Styles | Dynamic and lifelike | Basic animations | Subtle motion |
Pricing | Subscription-based | Free and premium | Free and premium |
Best For | E-commerce, ads | Social media posts | Photo enhancements |
Recommendations based on user needs and skill levels.
Beginners: Try Canva or Appy Pie for their simple interfaces and free plans.
Professionals: boolv and Vidnoz offer advanced features for high-quality animations.
Creative Enthusiasts: Motionleap is perfect for adding artistic touches to photos.
Whether you’re a beginner or a pro, there’s a tool to match your needs. Explore these options to find the one that works best for you.
Tips for Achieving High-Quality Results with AI Animation Tools
Start with High-Quality Images
Importance of resolution and clarity in the source photo.
The foundation of any great animation starts with a high-quality image. When you upload your image, its resolution and clarity directly impact the final result. Low-resolution photos often lead to blurry or pixelated animations, which can ruin the desired animation style. High-resolution images, on the other hand, capture finer details, making the effects look smooth and professional.
Think of it this way: the clearer your photo, the more lifelike your animation will appear. Whether you're animating facial expressions or creating background motion, starting with a sharp image ensures every detail shines through.
Tools for enhancing image quality before animation.
If your photo needs a little boost, several apps can help. AI Image Editors are perfect for refining images with minimal effort. They adjust brightness, contrast, and sharpness automatically. CapCut, known for its video editing features, also offers an AI-driven upscaling tool that doubles the resolution of your image. These tools make it easy to prepare your photo for animation, ensuring it’s ready to come to life.
Use Realistic and Subtle Effects
Avoid overdoing animations to maintain a natural look.
When applying effects, less is often more. Overloading your photo with excessive motion can make it look chaotic or unnatural. Instead, focus on subtle animations that enhance the image without overpowering it. For example, gentle facial movements like blinking or smiling can add life to a portrait. Background effects, like flowing water or moving clouds, create depth without distracting from the main subject.
Balancing creativity with realism for professional results.
Striking the right balance between creativity and realism is key. Purpose-driven animations, such as guiding viewers through a story, feel more engaging. Subtle effects like parallax scrolling or hover animations add personality while keeping the design professional. Always preview your work to ensure the motion feels smooth and complements the photo.
Experiment with Tools and Settings
Trying multiple tools like boolv to find the best fit.
Not all AI animation tools are created equal. Experimenting with different apps helps you discover which one suits your needs best. Boolv, for instance, excels at creating dynamic visuals for e-commerce, while Motionleap is ideal for artistic photo enhancements. Exploring various tools not only saves time but also boosts creativity by offering unique features.
Adjusting settings to match the mood or purpose of the animation.
Fine-tuning settings like speed, intensity, and transitions can transform your animation. For a calm and serene vibe, slow down the motion. For a lively effect, increase the speed slightly. Adjusting these settings ensures your animation aligns with its purpose, whether it’s for a social media post or a product showcase. Don’t hesitate to experiment until you achieve the desired animation style.
Tip: Always test your animation on the platform where it will be shared. This ensures it looks perfect and maintains its quality.
Animating still photos with AI tools is easier than ever. Start by choosing high-resolution images, then use tools like boolv to apply effects and refine the motion. Export your creation in formats like GIF or MP4 to share it anywhere. AI tools like boolv save time, reduce costs, and make animation accessible to everyone. They also spark creativity, letting you experiment with unique styles and effects. So, why wait? Dive into the world of AI and bring your photos to life today. You’ll be amazed at what you can create!
FAQ
How do AI tools like boolv animate still photos?
AI tools analyze your photo and apply motion effects, like facial expressions or moving backgrounds. With boolv, you upload your image, choose effects, and let the AI handle the rest. It’s quick and beginner-friendly.
Can I use boolv for e-commerce purposes?
Absolutely! Boolv is perfect for e-commerce. It transforms product images into dynamic videos that grab attention. You can create promotional content tailored for platforms like Shopify, Amazon, or Etsy.
What file formats can I export my animations in?
Most tools, including boolv, let you export in formats like GIF or MP4. GIFs are great for looping animations, while MP4s work best for high-quality videos on social media or presentations.
Do I need professional skills to use boolv?
Not at all! Boolv is designed for everyone. Its intuitive interface and AI-powered features make it easy to create stunning animations, even if you’re a complete beginner.
What’s the best way to share my animated photos?
For social media, optimize your animation’s aspect ratio and use engaging captions. Platforms like Instagram prefer square or vertical formats. Boolv also helps you tailor your animations for different platforms effortlessly.
See Also
Transform Still Images into Animated Visual Experiences
Creating Animation from Photos with Artificial Intelligence
Using AI Tools to Transform Videos into Animations
Accelerate your video production
10X with Boolvideo